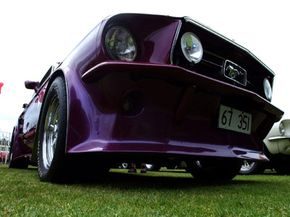
There is a specific kind of elegance in driving a restored classic through traffic. It is not the flash of a new supercar or the tech-heavy intimidation of a modern luxury coupe. It is the quiet confidence of a machine that has been coaxed back from the dead. Anyone with deep pockets can walk into a dealership and drop $300,000 on a brand-new Lamborghini. But bringing a 1960s muscle car or a vintage British roadster back to show-winning condition requires sweat. It requires time. It requires a commitment to safety that the original engineers never imagined.
The biggest mistake owners make? Treating the brake system as a museum piece.
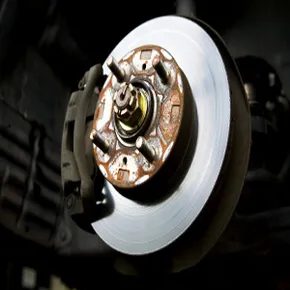
Old cars stopped well enough for their era. They did not stop well enough for today’s traffic laws or pedestrian density. Upgrading your brakes is the single most effective safety modification you can make. Better stopping power buys you milliseconds. Those milliseconds are the difference between a near-miss and a totaled chassis.
Power brakes change the game.
They reduce the physical effort needed to stop the vehicle. A manual brake system relies entirely on your leg strength. A power brake system uses vacuum or hydraulic assist to do the heavy lifting. You get shorter stopping distances. You get control. You get peace of mind.
This is not about buying a plug-and-play kit for a modern Honda. This is about converting a vintage vehicle from a manual drum or disc setup to a power-assisted system. You can swap everything at once. Drum to disc. Manual to power. Or you can take it one step at a time if the budget is tight.
First, you need the right tools.
Tools for Power Brake Conversion
Before you touch a wrench, you need to know what goes into the job. The tools required vary slightly depending on the vehicle year and the specific master cylinder kit you choose. However, a standard power brake conversion generally requires the following:
- Basic Hand Tools : A full set of metric and standard sockets and wrenches. You will need extensions and swivel joints to reach tight bolts in the engine bay and under the car.
- Brake Line Flaring Tool : If you are replacing old steel brake lines with new ones, you will need to flare the copper or steel tubing yourself. A double-flaring tool is standard for modern safety standards.
- Brake Bleeding Kit : A vacuum bleeder or a two-person bleeding kit is essential to remove air from the new system. Air bubbles in brake lines cause spongy pedals and reduced stopping power.
- Torque Wrench : Brake calipers, wheel cylinders, and master cylinder bolts require precise torque specifications. Over-tightening can crack calipers. Under-tightening leads to leaks or parts falling off.
- Jack and Jack Stands : You must safely lift the vehicle to remove wheels and access the brake assemblies. Never work under a car supported only by a jack.
- New Hardware : This includes the power brake booster, master cylinder, pushrod, and often new brake lines and hoses. Do not reuse old rubber hoses. They degrade over time.
- Brake Fluid : DOT 3 or DOT 4 fluid, depending on your vehicle’s requirements. Use fresh fluid from a sealed container. Old fluid absorbs moisture and lowers the boiling point.
The process
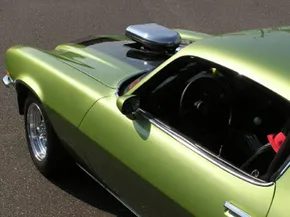

This isn’t a weekend hobby for casual wrench-turners. A power brake conversion demands an experienced hand and serious patience. You need to actually understand how hydraulic systems pressurize. If you’re stubborn enough to DIY, stock up. You’ll need brake line wrenches. A bleeder kit. A full socket set with extensions to reach across the firewall. Stubby-handle wrenches save your knuckles here.
Time Commitment: The Weekend Trap
How long does this take? Don’t bet on an afternoon. Bolt-on kits are notorious for missing hardware. Instructions are often vague. Fits are rarely perfect. Plan for a full weekend minimum.
Why the delay? Access is the killer. Take a vintage Mustang for example. To swap a manual setup for a Master Power conversion kit, one installer had to rip out the brake pedal. The steering column came out too. The entire gauge cluster was sacrificed just to reach the firewall. That’s three major components gone before you even touch a brake line.
Breaking Down the Price Tag
You want the conversion. But can you afford the shock? The cost swings wildly. It depends on your vehicle’s make. The quality of parts you pick matters. The manufacturer of the system plays a role.
Expect to drop at least $300 to $500. That’s for the core hardware. We’re talking the diaphragm and master cylinder. That number excludes labor. Labor varies based on accessibility. If your firewall is a maze, your bill goes up.
For that $300–$500 range, you usually get:
– A new master cylinder
– The vacuum booster diaphragm
– Vacuum hose connections
– Sometimes a new brake pedal
It’s not cheap. But it’s not impossible either.
Power Brake Conversion Parts
Next up is a breakdown of every component involved. You need to know what you’re buying before you start unscrewing anything.

The Heart of the Upgrade: Boosters and Pedals
Everything starts with the power brake booster. This is the heavy metal sitting against the firewall, directly behind the master cylinder. It doesn’t generate power itself. Instead, it siphons energy from the engine’s vacuum. You already know how this feels. Try turning the steering wheel on a cold morning with the engine off. It fights you. Hard. Hit the brake pedal without the engine running and it feels like trying to stop a freight train with your bare hands.
Turn the key. The engine wakes up. The vacuum engages. Suddenly, the steering wheel floats. The brake pedal drops like a stone. That’s the difference. That’s the point of the upgrade.
A complete power brake conversion kit rarely stops at the booster. You will likely need a new brake pedal. The geometry changes. The new pedal travels a shorter distance to achieve maximum stopping power. It feels different in the footwell. Crisper. More direct.
Depending on the specific kit, the box might also contain other hardware. You might get a fresh brake fluid reservoir. A brake force distribution block is common in these setups. Some kits include a proportioning valve. This small component dictates the ratio of braking force sent to the front wheels versus the rear wheels. It prevents the rear from locking up too early. It balances the chassis.
When Vacuum Isn’t Enough
Vacuum-assist boosters are the industry standard. They are cheap. They are simple. But they rely on an engine that runs smoothly and creates strong vacuum. Some cars don’t. If your engine is modified, or if you are driving a vehicle that struggles with vacuum pressure, the standard booster won’t cut it. The brakes will feel soft. Unresponsive.
Enter the hydroboost system. This is an all-hydraulic setup. It ignores the engine’s vacuum entirely. Instead, it taps into the power steering pump. The pressure from the hydraulic steering system drives the brake booster. More pressure. More stopping power.
There is one catch. Your car needs power steering. Back in the day, power steering was a luxury feature found on big cruisers. Most classic cars came with manual steering. If your car doesn’t have power steering, you need to install a kit first. The aftermarket has filled this gap. You can bolt on power steering components to older frames. Once the steering is assisted, the hydroboost unit can take over the braking load.
The Electronic Future
Vacuum and hydraulic systems work. They have worked for decades. But they are becoming archaic. Manufacturers are moving toward fully electronic braking systems. These are not just upgrades. They are a different architecture.
Electronic brake controls weigh less. They respond faster. They talk to the car’s computer. The onboard systems can analyze wheel speed, traction, and weight transfer in real-time. They can apply braking force more effectively than a human foot ever could. A vacuum booster is a mechanical slave. An electronic system is a partner.
This shift is coming. Whether it arrives tomorrow or in ten years, the age of the vacuum booster is ticking. We are moving toward a world where the brake pedal is just a sensor, not a mechanical link. Until then, we stick with steel lines and vacuum hoses. We bleed the fluid. We adjust the proportioning valve. We keep the classics on the road.
The next step is the install. Understanding how the pieces fit
Vintage Power Brake Conversion: The Installation Reality
If you are working on a vintage American muscle car from the 1970s or earlier, the odds are heavily in your favor. You can likely find a power brake conversion kit designed specifically for your chassis. Why does this matter? Because the manufacturer has already solved the engineering headaches. They’ve calculated the optimal booster size and determined exactly where it mounts relative to the firewall and pedal box. You aren’t guessing. You’re following a map.
But what if you are building a street rod with a non-standard frame? Or maybe you’re fitting a modern engine swap into a classic body where no pre-made solution exists. Then you’re on your own. You’ll be fabricating custom mounting brackets and hand-bending stainless steel brake lines. This is not for the faint of heart. If you lack experience with metal fabrication, pay a pro. A failed brake system doesn’t just ruin your day; it ends your life.
When you do get to the bench work, the process breaks down into several distinct, messy stages. It’s not a bolt-on, plug-in affair like replacing a battery. You’re digging into the passenger footwell, moving stuff, and disconnecting everything that stands in the way.
Here is the actual mechanical choreography you’ll face during a vintage vehicle power brake installation :
- Strip out struts, cowl panels, and any trim crowding the master cylinder area.
- Disconnect the hard lines and flexible hoses running to the combination valve.
- Unbolt and remove the old manual master cylinder.
- Detach the brake pedal assembly from the floor pan.
- Install the new power brake booster, master cylinder, and pedal linkage.
- Re-route vacuum lines, reconnect the brake fluid lines, and bleed the system.
The instructions included with your kit will usually make it clear which line goes where. They are rarely ambiguous. If they are, call the tech support number for the kit retailer. Don’t guess.
The real difficulty isn’t understanding the diagram. It’s tracking down every bolt, clip, and bracket you pulled out of the firewall to get there. You will find yourself on the floor, flashlight in mouth, trying to remember if that small bracket held up a heater box or just a vacuum hose.
And let’s talk about the firewall. On many older vehicles, the existing holes for the master cylinder studs won’t align with a modern power booster. You will likely need to drill new holes in the steel. This introduces rust. It introduces structural weakness if done poorly. It requires precision.
Is it worth it?
For those of us who have spent decades pumping a stiff brake pedal on a hot summer drive, the answer is a resounding yes. The difference in pedal feel is night and day. The stopping power increases. Your calf muscles stop screaming in protest. It’s a safety upgrade that also happens to be a luxury upgrade.
It is labor-intensive. It is messy. It requires patience. But when you finally press the pedal and feel that hydraulic assist take the weight off your foot, you’ll know why you bothered. The rest of the brake system maintenance can wait until you catch your breath.